How to create a Slack APP and use it with Roxy-WI
Slack is an operations performance platform that provides IT alert monitoring, on-call scheduling, and escalation policies to address issues in applications, servers, and websites throughout the entire incident lifecycle.
Checker is a service that monitors HAProxy, NGINX, Apache and Keepalived services as well as HAProxy backends. Checker sends a notification via Telegram, Slack, email, PagerDuty and/or Mattermost when a backend or service is down. It also supports real-time alerting via the Roxy-WI panel and stores the history of incidents.
First, create a Slack app in your Slack API dashboard. Log into your Slack workspace in your browser and go to the API dashboard. Click Create an App.
In the form that opens, provide a name for your application and select a Slack workspace for development. For the purposes of this tutorial, name your application Roxy-WI and choose a workspace where you have administrator access. Then, click Create App.
After creating your application, you should see the default application dashboard appear. In this dashboard, you will manage the application, its permissions, event subscriptions, installation to workspaces, and more.
Now, grant your app the necessary permissions to send messages to channels. To do this, click Permissions on the control panel.
Scroll down the OAuth & Permissions page until you reach the Scopes section. Find the Bot Token Scopes subsection and click Add an OAuth Scope.
Enter chat:write, select the permission shown in the screenshot, and add it to your bot. This will enable the app to send messages to the channels it has access to.
After adding the necessary permissions, install the application in your Slack workspace. To do this, scroll to the top of the OAuth & Permissions page and click Install App to Workspace.
Click this button to review the actions the application can perform in the channel. Then, click Allow to complete the installation.
After installing the bot, you will receive a Bot User OAuth Access Token for your application. Be sure to copy this token, as it will be needed to perform actions in the workspace.
Final step is to add the new bot to a channel in your workspace. If you haven't created a channel yet, you can use the default #general channel that is available in your Slack workspace. Find the app in the Apps section of the Slack client navigation bar and click on it. Then, open the Details menu in the upper right corner. If your Slack client is not in full-screen mode, the icon for this menu will appear as an i inside a circle.
To finalize adding your app to the channel, click More (represented by three dots) on the details page and select Add this app to a channel.... In the modal window that appears, enter the name of the channel and click Add.
You have successfully created an app and added it to a channel in your Slack workspace.
After obtaining the token, create a channel in Roxy-WI. Go to the Monitoring => Channels section and click Add in the Slack Channels area. In the form that appears, enter the token in the "Token" field, provide a name in the "Channel" field, and select a group if necessary.
To verify that the integration has been successfully completed, click Test. Roxy-WI will then send a test message to Slack.
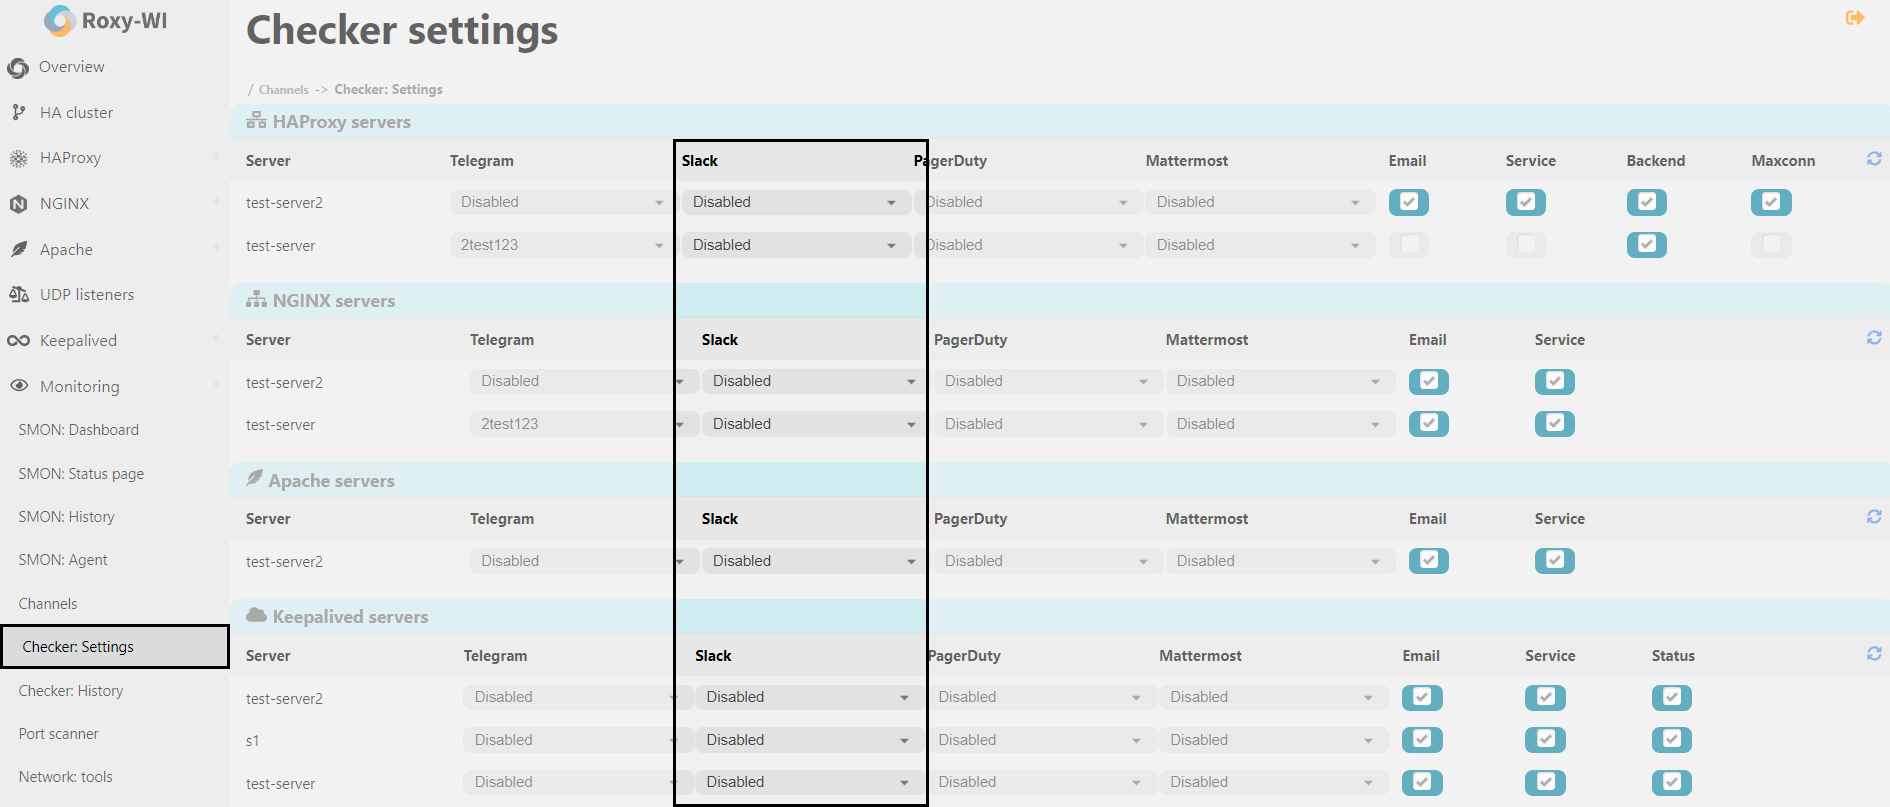
After this, the Slack channel is ready for use. Go to the Monitoring => Checker: Settings section and select the Slack channel for the services you want to receive alerts for:
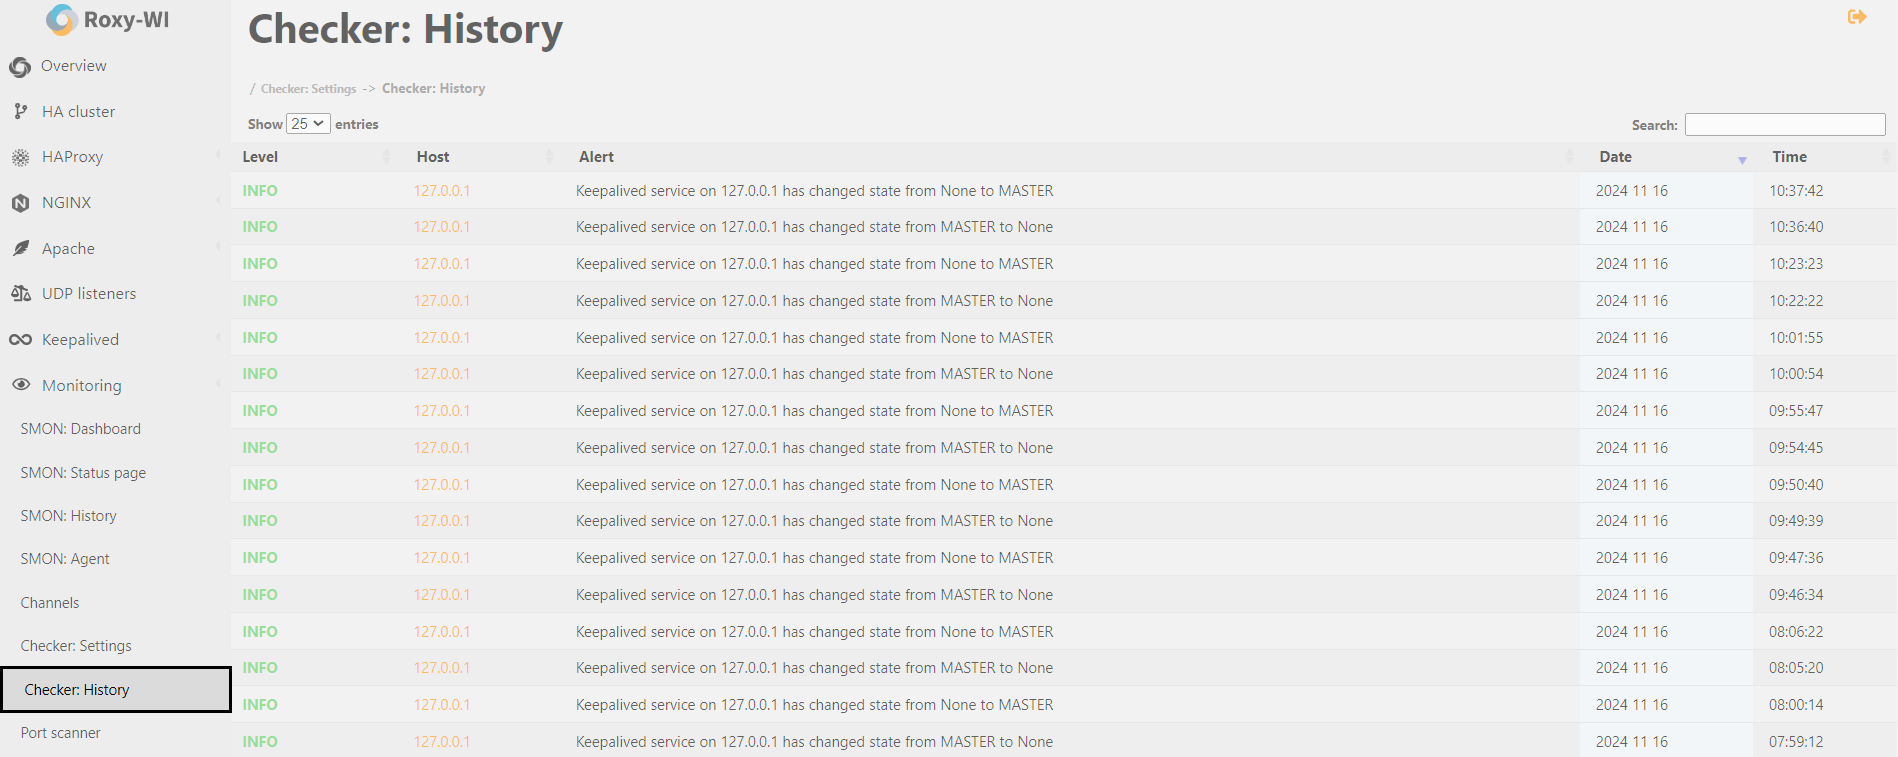
Additionally, once a checker is enabled for servers, Roxy-WI begins collecting incident history, which can be valuable for future debugging. You can find it in the Monitoring => Checker: History section:


