How to create proxy pass
HTTP proxy pass enables Nginx reverse proxying to backend services like Apache, Node.js, or microservices. This feature routes client requests through Nginx while preserving original client information and protocol details. It has a protocol support for HTTP, HTTPS, WebSocket, and gRPC.
Go to the NGINX => Add proxy => Add proxy pass section and follow the steps below.

1. Server
Choose the target Nginx server from the drop-down list.
2. Name
Specify your service primary domain name or IP address in the Name field and additional domains/subdomains or IP addresses in the Name alias field.
3. Protocol and port
Select HTTP or HTTPS protocol and specify the port (80 for HTTP, 443 for HTTPS, or a custom one).
4. Location
Configure how Nginx handles requests for specific URL paths:
- Specify the URI path
- Configure timeouts (in seconds)
- Add headers to preserve client data
- Specify your upstream
5. Security
Check the Hide server tokens box to remove server identification from headers. You can also enable security headers by checking the corresponding box.
6. Compression
Enable the option to compress responses and reduce bandwidth. Configurefile types for compression, minimum length and a compression level (1-9, where 6 is optimal).
After configuring all the settings, click Add to generate proxy pass rules.
To edit the created proxy pass configuration, go to the NGINX => Config section, select the server from the drop-down list, select your proxy pass configuration, and click Edit.
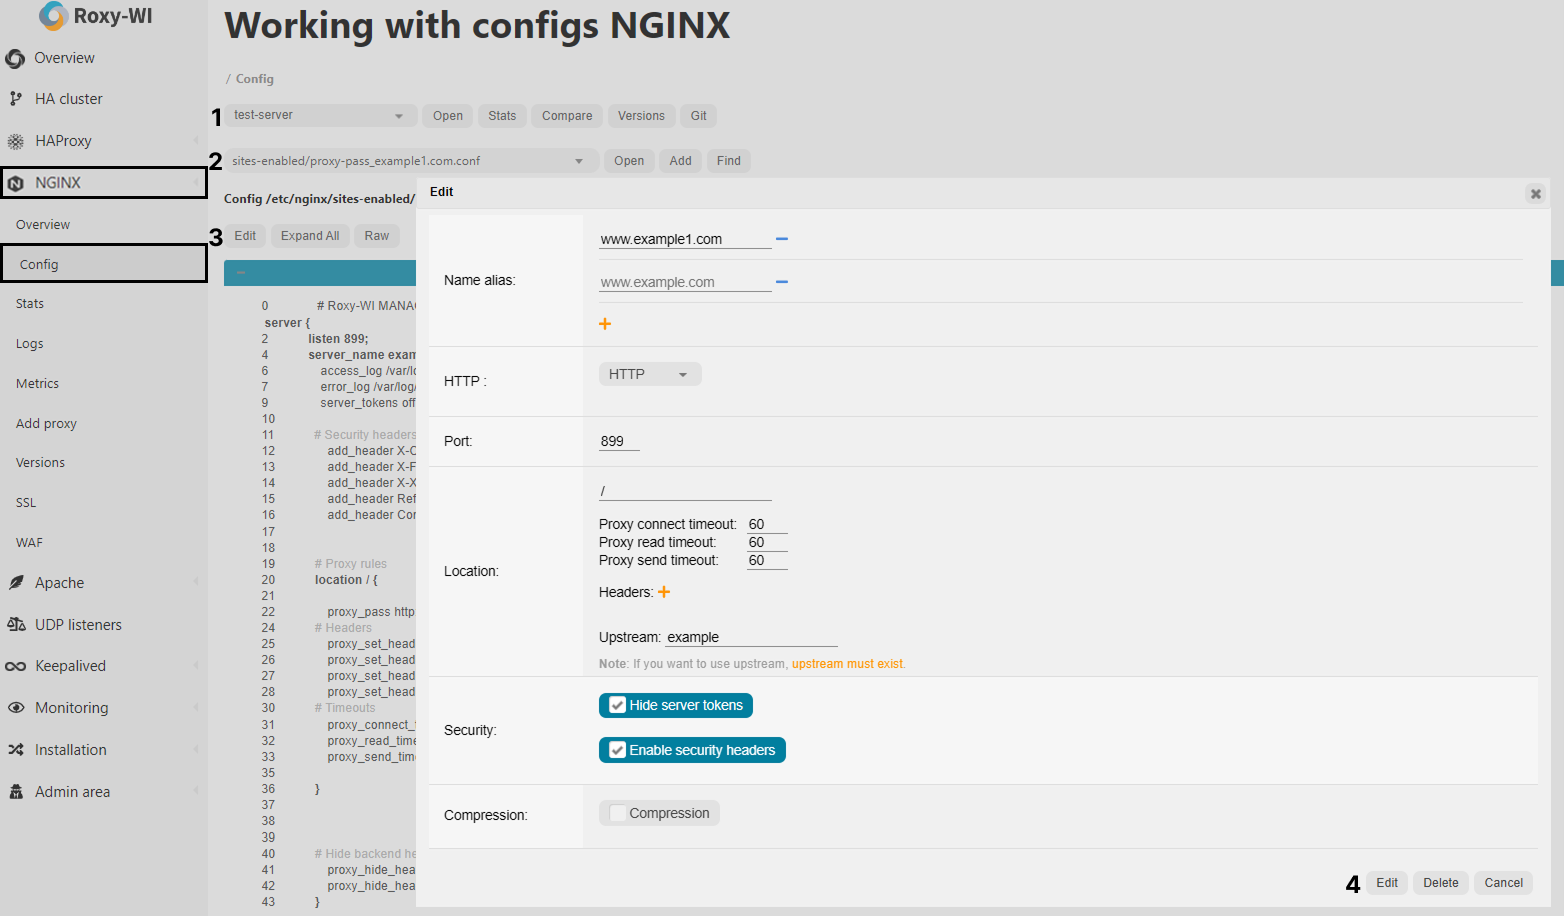
Here you can modify all the parameters except your service primary domain name/IP address.