How to create high available cluster for HAProxy, NGINX and Apache (before 7.1)
The Virtual Router Redundancy Protocol (VRRP) is a computer networking protocol that provides automatic assignment of available Internet Protocol (IP) routers to participating hosts. This increases the availability and reliability of routing paths via automatic default gateway selections on an IP subnetwork.
The protocol achieves this by creation of virtual routers, which are an abstract representation of multiple routers, i.e. master and backup routers, acting as a group. The virtual router is assigned to act as a default gateway of participating hosts, instead of a physical router. If the physical router that is routing packets on behalf of the virtual router fails, another physical router is selected to automatically replace it. The physical router that is forwarding packets at any given time is called the master router.
VRRP provides information on the state of a router, not the routes processed and exchanged by that router. Each VRRP instance is limited, in scope, to a single subnet. It does not advertise IP routes beyond that subnet or affect the routing table in any way. VRRP can be used in Ethernet, MPLS and Token Ring networks with Internet Protocol Version 4 (IPv4), as well as IPv6.
When you have created a HA cluster, the keepalived daemon can be used to monitor services or systems. In case of failover the standby router is enabled. It will work as it is shown in the image below:
Roxy-WI will keep synced the configs of the master server and those of the slave. When a config is a edited or new sections are added to it, the server is restarted.
Roxy-WI can check whether services such as HAProxy, NGINX are already installed and running. If they are not, Roxy-WI’ll try to install them. Just tick the checkboxes with corresponding services names to do it. Keep in mind, that HAProxy service is enabled by default if no other service’s selected.
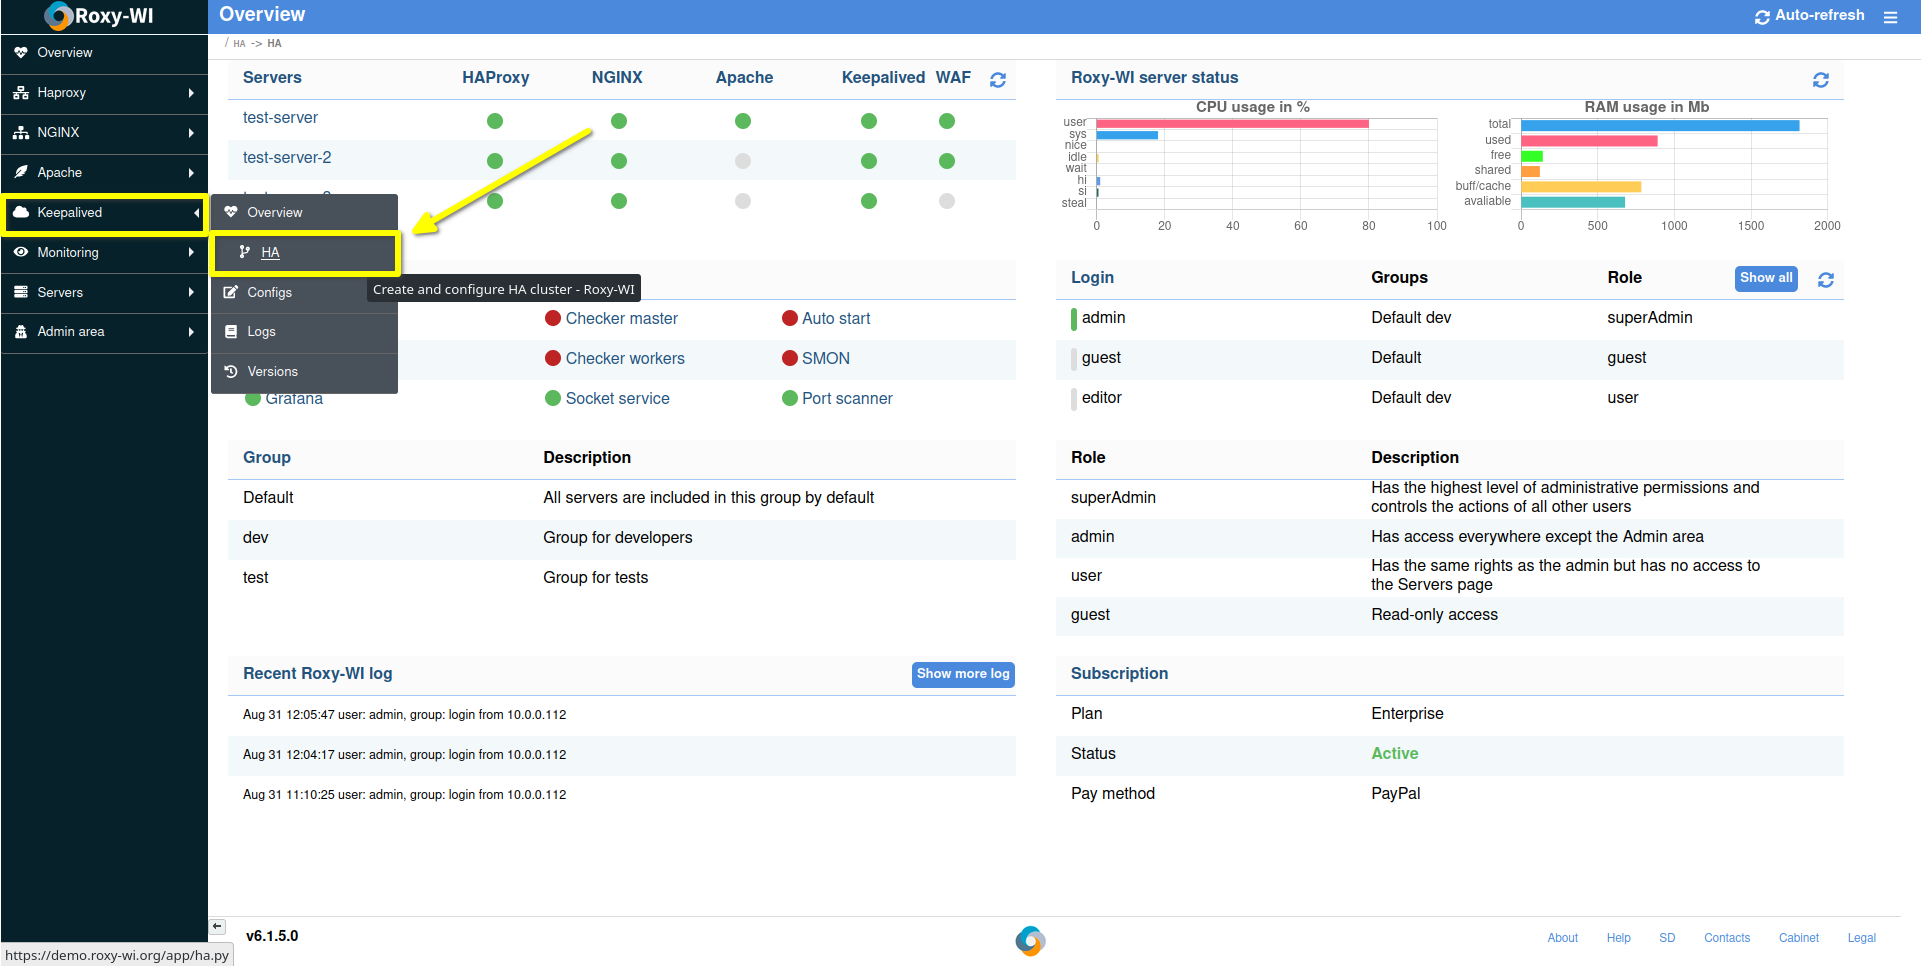
To create a HA cluster open Keepalived -> HA page.
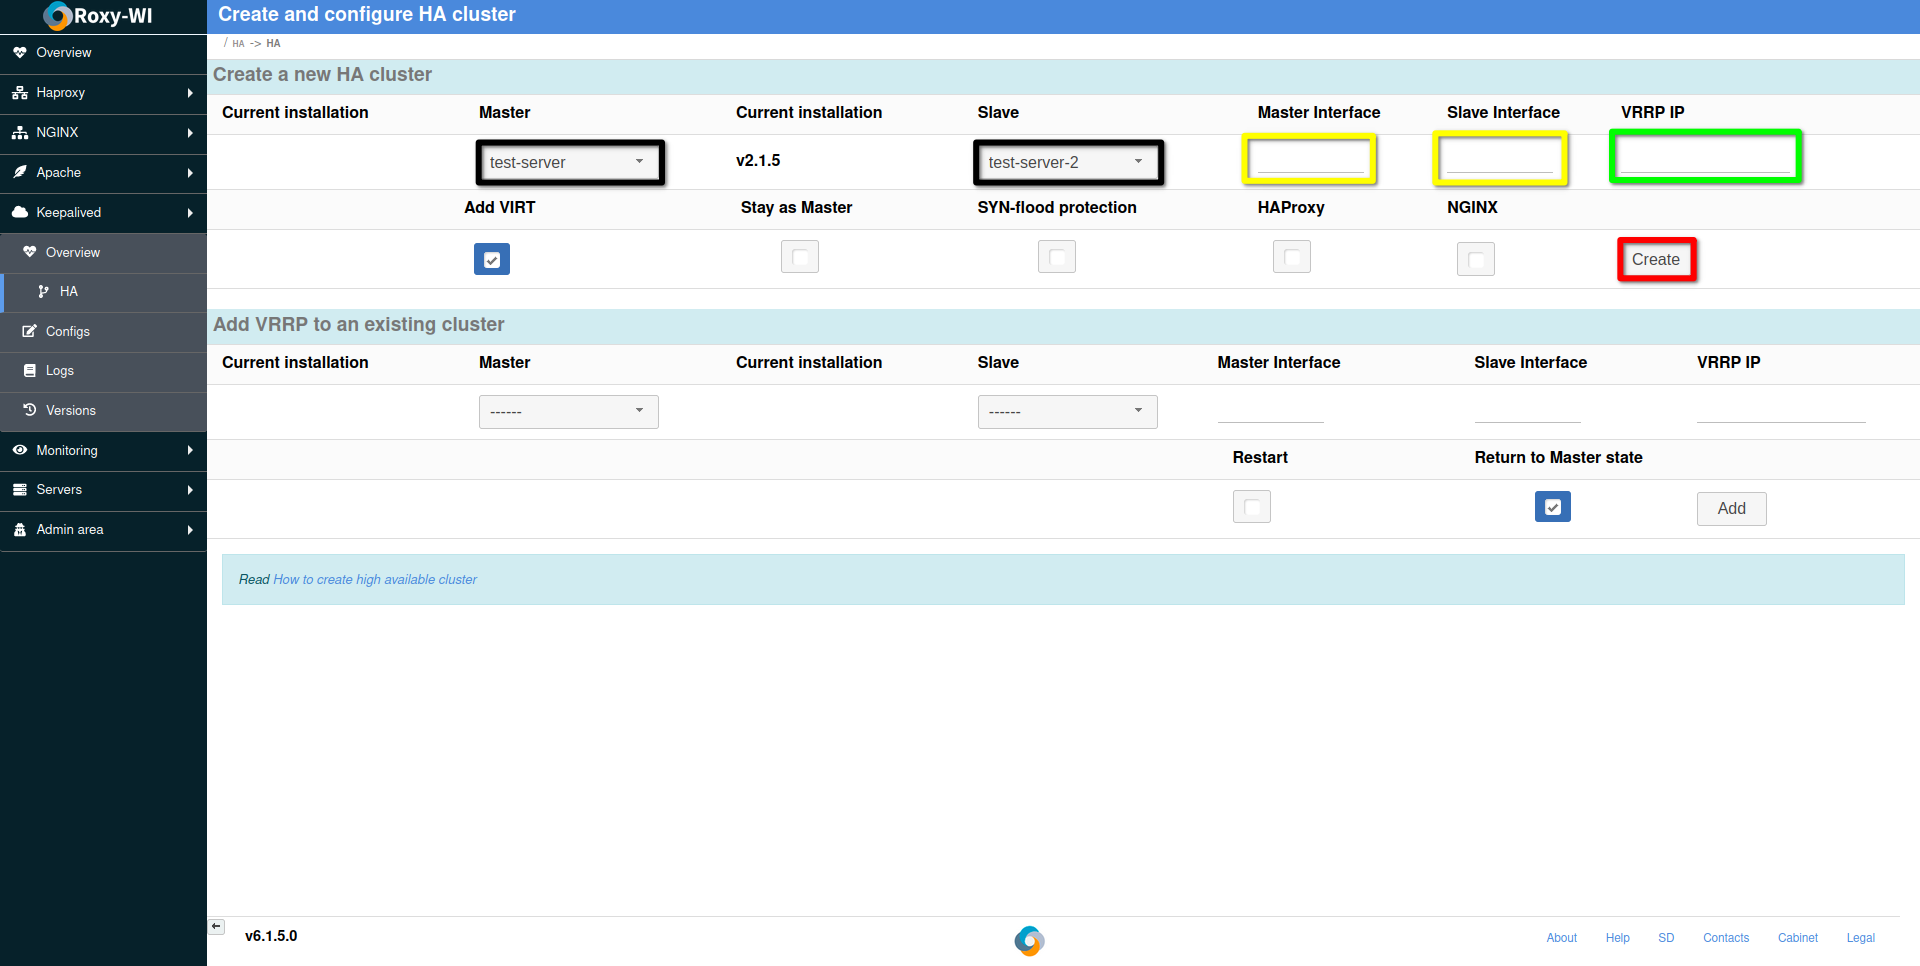
Choose the master and the slave servers (in black boxes). Then select the network interfaces (in yellow boxes): press the down arrow key or start typing, Roxy-WI will prompt you a network interface.
Enter the VRRP IP address (in the green box). It will be used as the failover address, and you should route your traffic to it.
Press "Create" (in the red box) to create a HA cluster. Now your cluster is ready for use.
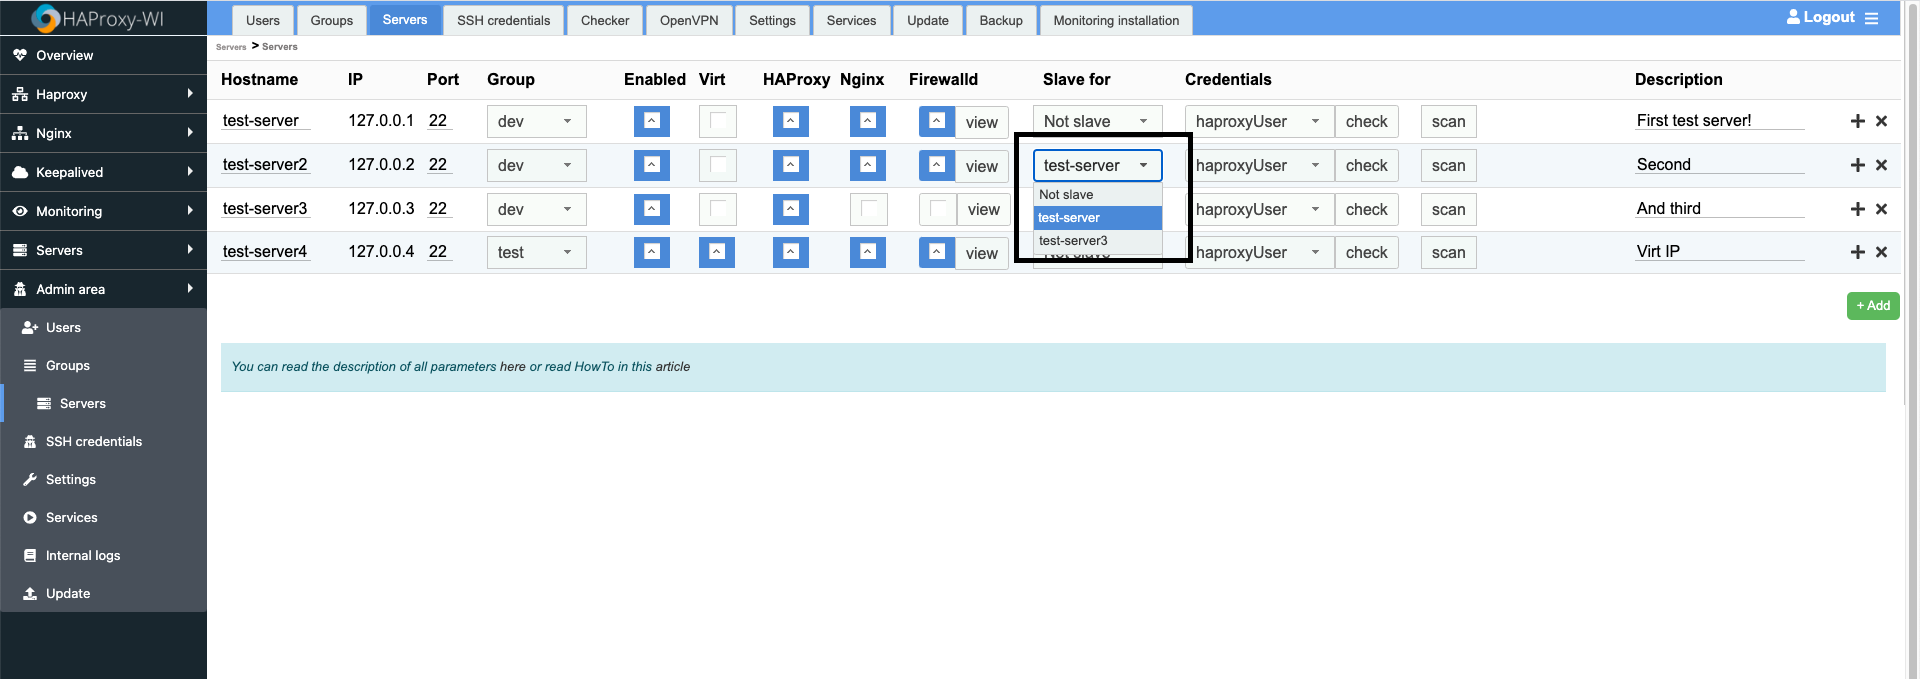
After you have created the HA cluster, Roxy-WI will use HAProxy, Nginx and Apache service as master and slave. If it has not occurred, go to the Admin area (or Servers if you use groups) -> Servers tab and select a master server:
When the two servers are combined, the config of the slave will be updated when you update it on the master.
Roxy-WI will also keep synchronized the uploaded SSL certificates, the black/white lists and maps.
The virtual IP is the single IP address that will be used as the point of access to the HA cluster. It is configured in the Keepalived configuration. When a user accesses a virtual IP, the traffic is directed to the appropriate server according to configure HAProxy policy. With Roxy-WI you can configure virtual IP via the web interface. To create the virtual IP when creating the cluster set the "Add VIRT" checkbox and press Create. If all has passed successfully, the new server will be added to the cluster; in the list of the servers it will be marked as "VRRP IP for [Your_server_IP]