How to create and manage blacklist for HAProxy
A blacklist is a security measure used to block specific IP addresses from accessing a network or service. When an IP address is blacklisted, any traffic originating from that address is automatically dropped, regardless of the filtering policies applied to individual TCP ports.
In contrast, a whitelist is a security measure that allows only specified IP addresses to access a network or service. When an IP address is on the whitelist, it is granted access, while all other addresses are denied by default.
The blacklist, as well as the whitelist, cannot include more than 512 different class C networks, which can limit the effective management of a large number of IP addresses.
With Roxy-WI, you can create and manage blacklists and whitelists through the web panel.
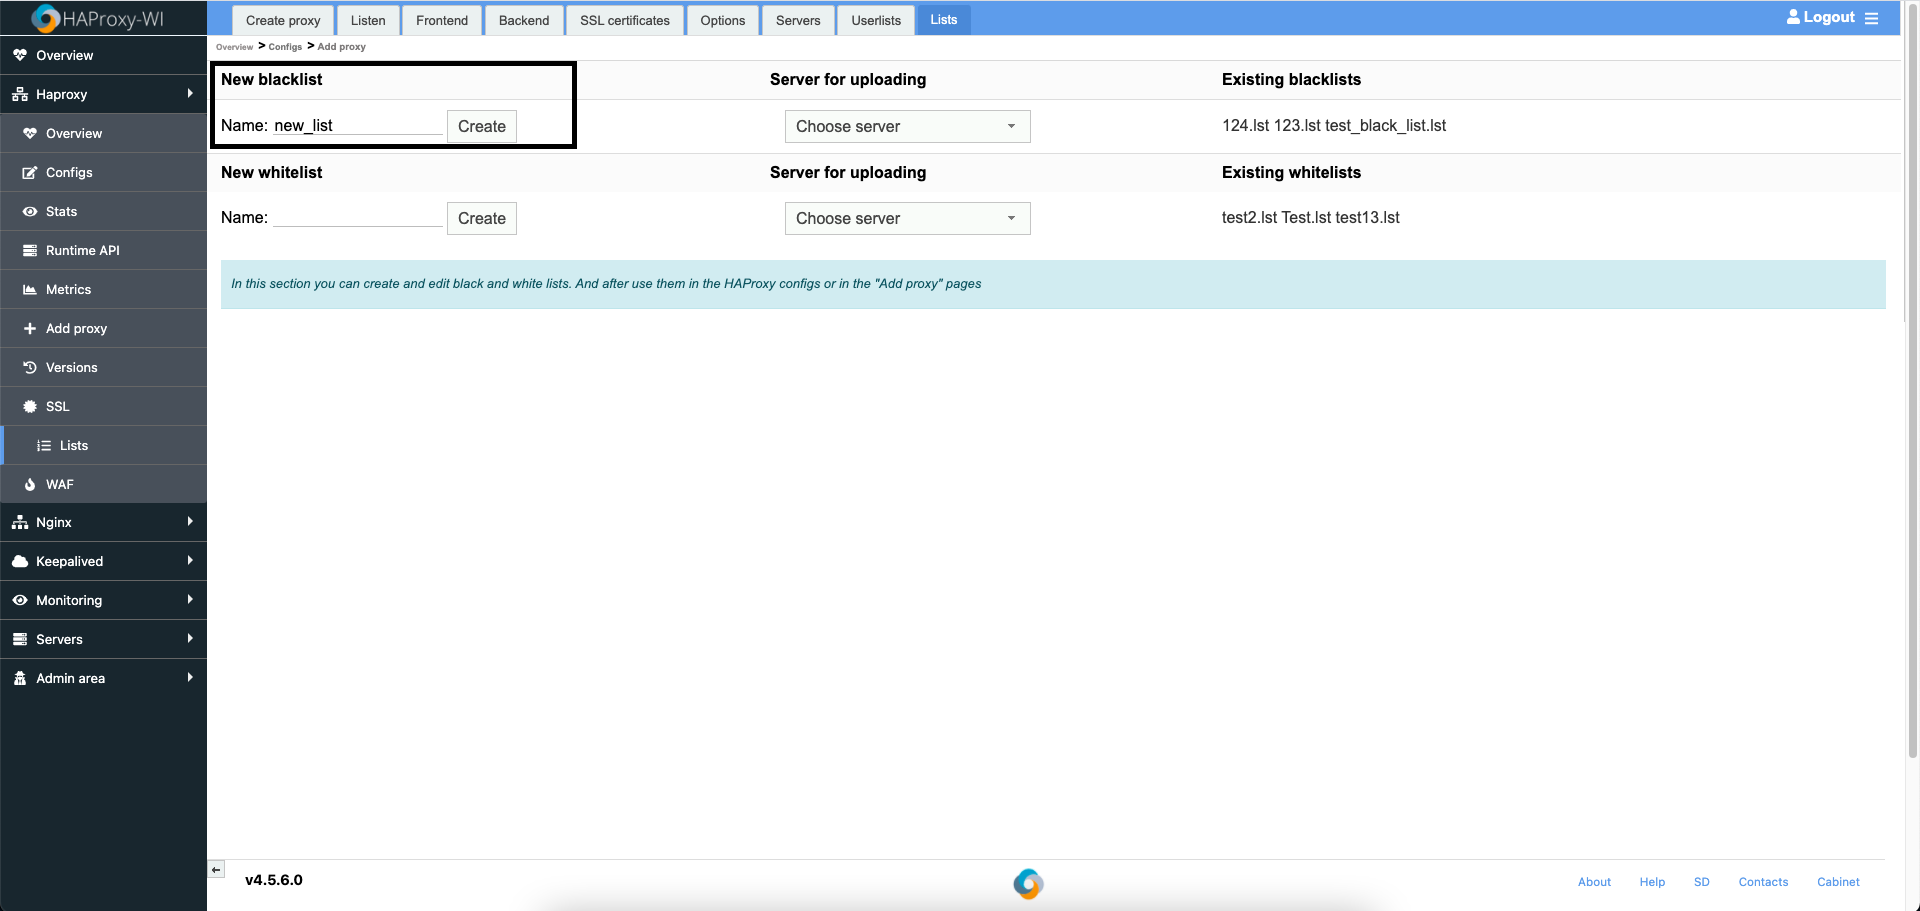
To create a blacklist or whitelist, go to the HAProxy => Add proxy => Lists section, enter the name of a new blacklist or whitelist, and click Create. After this, reload the page, and your list will appear in the Existing blacklists or the Existing whitelists section accordingly.
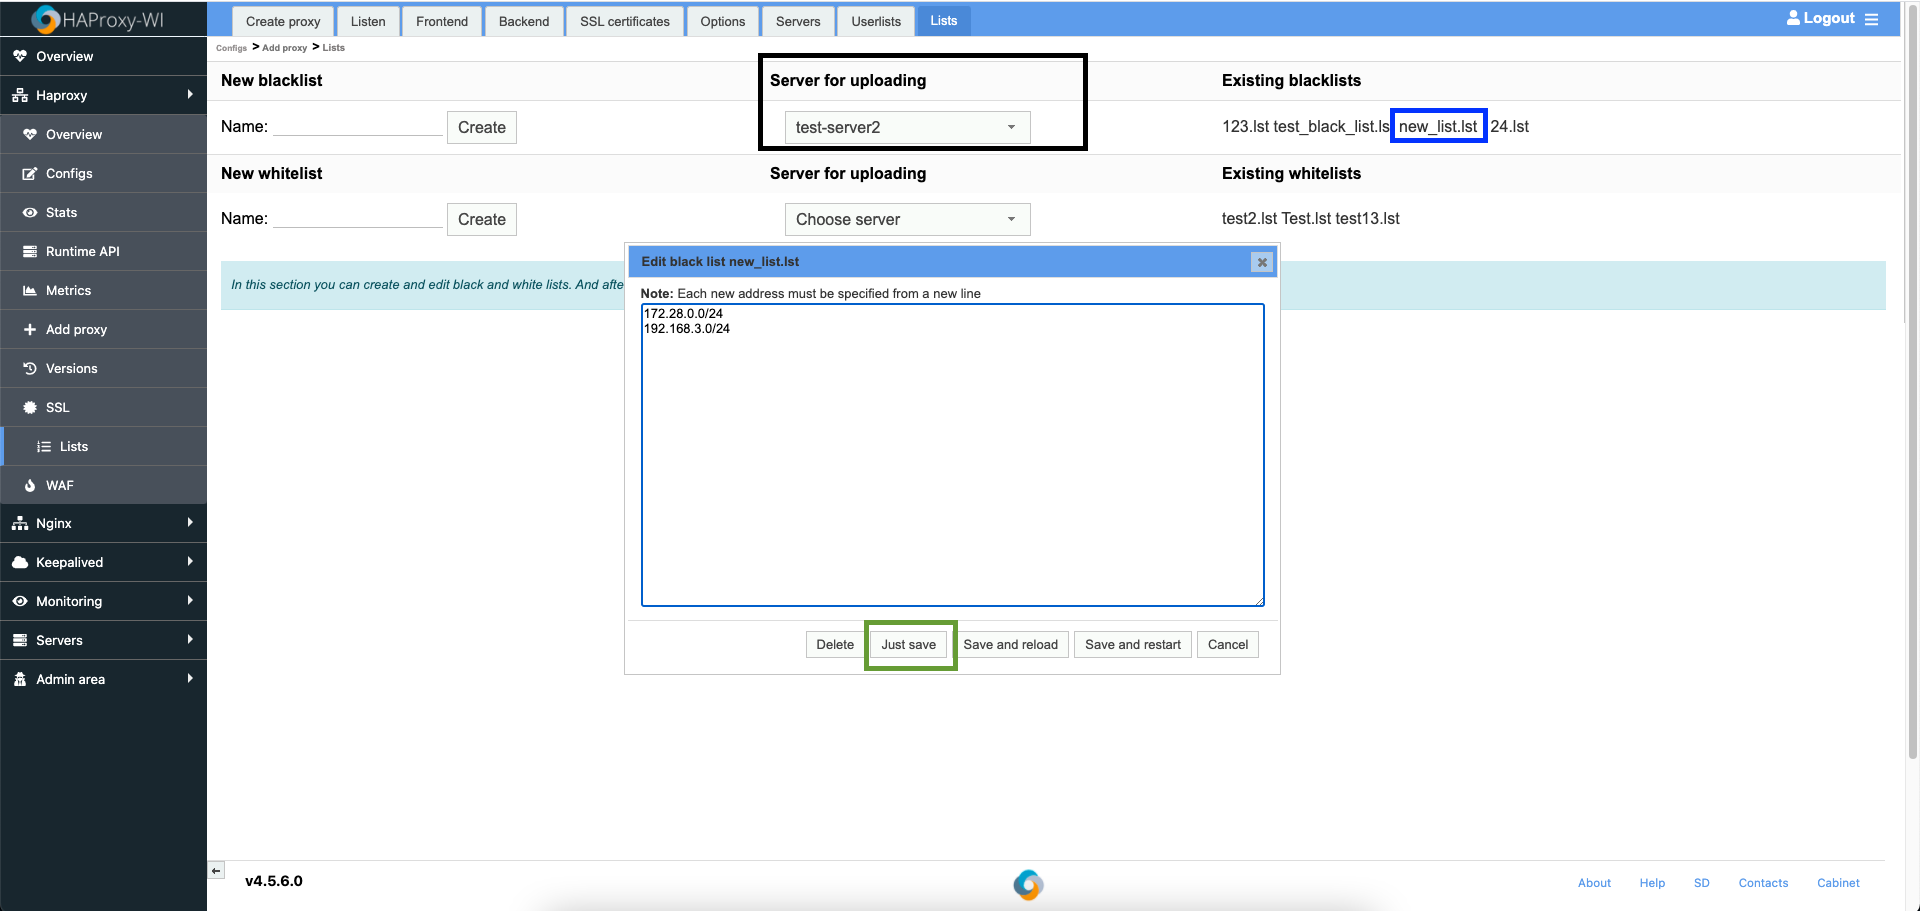
To edit a blacklist or whitelist, select a server for uploading, then click on the name of your list to open and modify it. Add or remove the desired IPs, and click Just save to avoid unnecessary reboots of the HAProxy service.
After creating and editing the list, go to the HAProxy => Add proxy section and select the type of proxy you would like to create. For example, if you choose Frontend, open the Frontend tab. Next, click Show advanced settings to reveal additional settings. In the WAF section, check the Blacklist or the Whitelist box and begin typing the name of the list you just created.
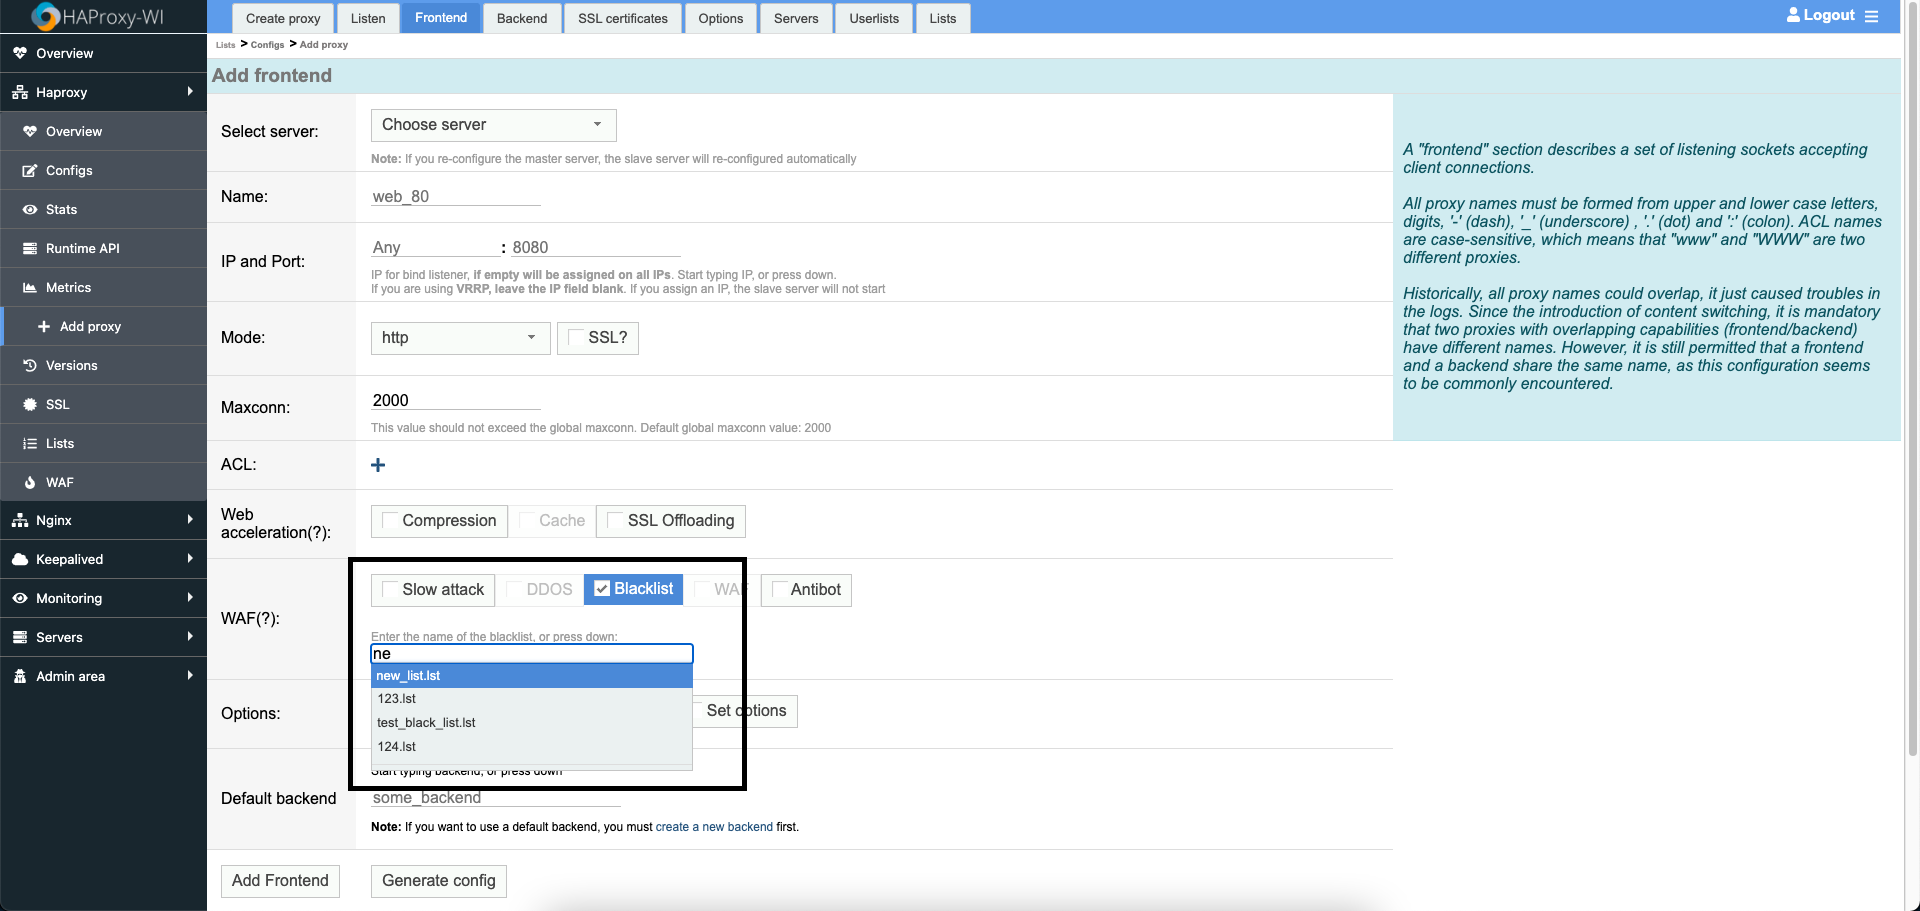
Select the blacklist or whitelist, complete all required fields, and click Add Frontend. Rememeber to restart the HAProxy service afterward.
You can also edit your lists directly through the console without using the HAProxy web interface. However, in this case, you will need to restart the HAProxy service after saving any changes, which may be inconvenient, especially if you manage multiple HAProxy services.
For this reason, Roxy-WI allows you to edit lists via the web panel without the need to restart HAProxy services, ensuring that changes are applied persistently. Your customers won’t even notice any changes.
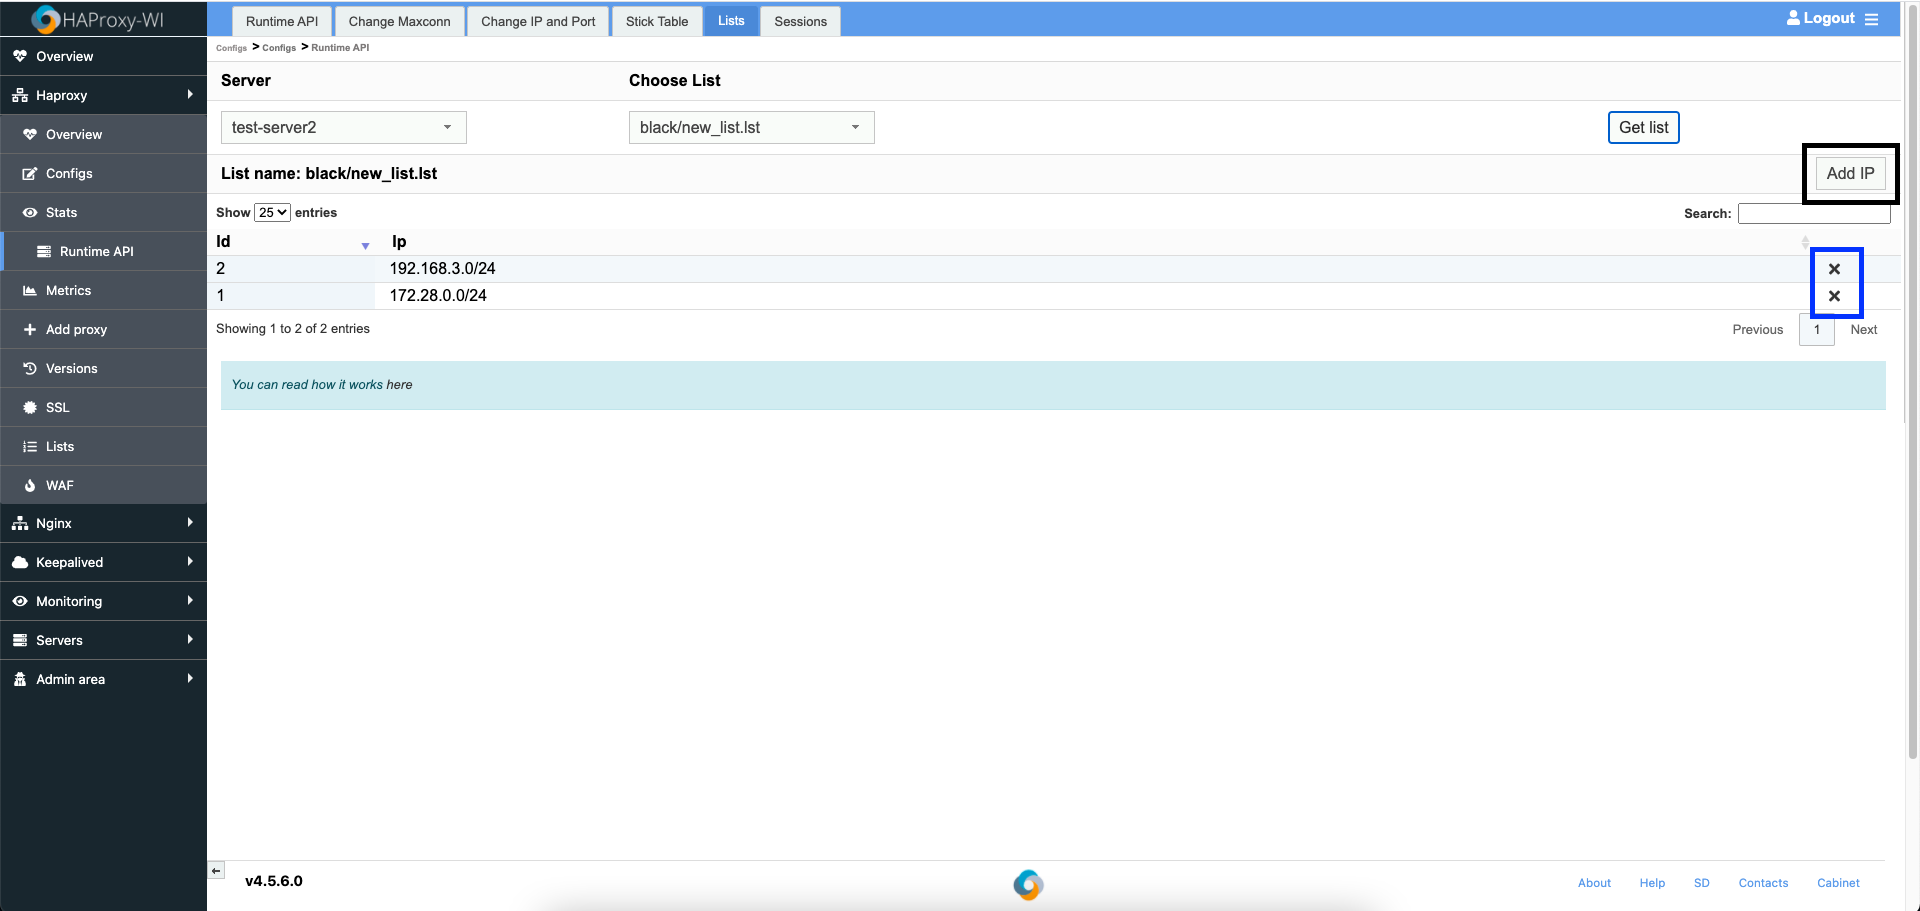
To do this, go to the HAProxy => Runtime API => Lists section, select a server, and you will see the lists currently in use in the HAProxy configuration.
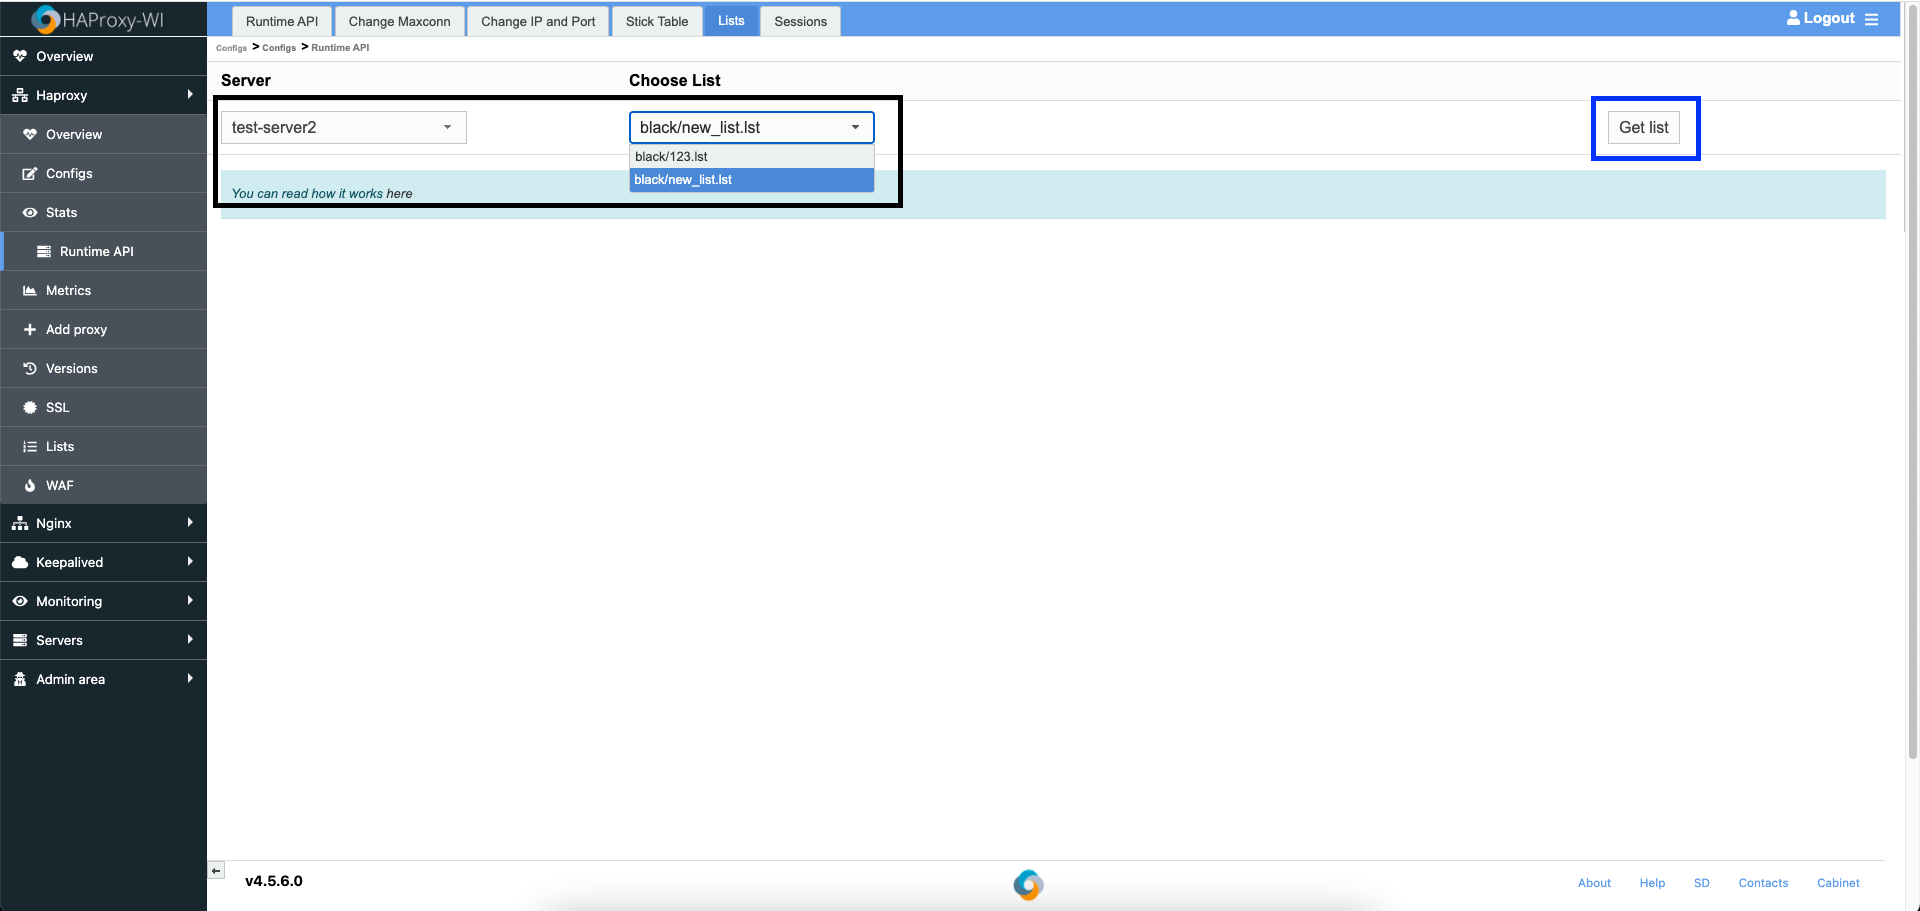
Click Get list to view the contents of the selected list. You can add and delete IP addresses as shown in the picture below. These changes will take effect immediately. Roxy-WI will also update the blacklist or whitelist to ensure that your modifications are saved for the next restart.